“`html
Effective Guide to How to Record Screen on Windows 10 for Better Productivity
Understanding Windows 10 Screen Recording Options
In today’s fast-paced digital world, **recording your screen** can significantly boost your productivity. Whether you’re creating educational content, sharing a video tutorial, or capturing your gameplay, knowing **how to record screen** effectively is essential. There are various **screen recording software** options available, ranging from built-in tools like the **Windows 10 screen recorder** (Game Bar) to third-party applications. This section will cover some of the primary **screen recording tools** and their features that can cater to different needs.
Built-in Tools for Screen Recording
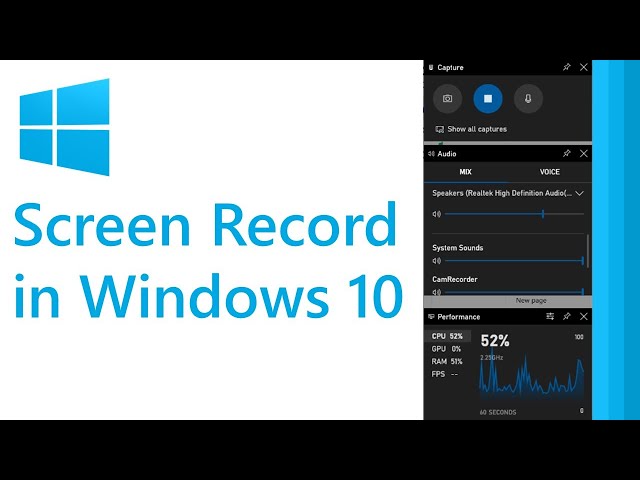
Windows 10 comes equipped with the **Game Bar**, a user-friendly feature designed primarily for gamers to **record gameplay**. To enable it, simply press Windows + G to open the Game Bar overlay. From there, you can start **full screen recording** by clicking on the ‘Record’ button, or use the keyboard shortcut Windows + Alt + R. The Game Bar also allows you to manage your **audio settings for recording**, making it easy to include background music or commentary as needed.
Third-Party Screen Recording Software
While the Game Bar is convenient for casual recording, there are many robust **screen recording software** options available for advanced users. Tools like OBS Studio and Camtasia offer **screen recording without watermark** capabilities and extensive editing functionalities. OBS Studio, for instance, allows you to **record screen with audio Windows 10** and supports recording in high definition, providing flexibility and professional quality. Compare features such as customizable recording settings, support for multiple formats, and ease of use to find what fits your needs best.
External Screen Recorders
If you’re looking for portability, **external recorders** can also serve your purposes. Devices like the Elgato Game Capture provide advanced features for **record gaming** and other content capture easily, especially for creators focusing on high-quality video output. This approach is particularly useful for longer sessions or specialized recordings that may require specific resolution settings you cannot achieve with limited software options.
Step-by-Step: How to Use Windows Game Bar for Screen Recording
The Windows Game Bar is a potent tool for anyone wanting to quickly record screen activity. Following a straightforward step-by-step guide ensures you can utilize this feature effectively. Here are the essential **screen recording steps** to get you started on recording your screen like a pro!
Setting Up Game Bar for the First Time
To use the Windows Game Bar, first check to ensure it’s enabled in your settings. Navigate to Settings > Gaming > Xbox Game Bar, and toggle it on. Here, you can configure the **recording settings** to your preference, including frame rates and audio inputs, ensuring a smooth recording experience. Once set up, you’re ready to start **capturing screen activity** easily.
Recording Your Screen with Game Bar
Once you have the Game Bar activated, press Windows + G while the application or desktop you want to record is open. Click on the ‘Record’ button to start your **screen recording**. It’s ideal to use screen recording shortcuts which simplify the process. Mention any segments of the recording you might want to highlight by using additional overlays or toolsets available in the Game Bar. You can pause or stop anytime using Windows + Alt + R.
Editing and Saving Your Screen Recordings
After capturing your screen, it’s essential to edit your recordings to enhance clarity and professionalism. Using video editing tools like Shotcut or Camtasia can greatly help in this aspect by enabling you to cut unnecessary parts, add transitions, and include background audio. Make sure to **save screen recordings** in multiple formats suitable for your intended use, whether for tutorials, presentations, or gameplay highlights.
Best Practices for High Quality Screen Recording
<pTo maximize the effectiveness of your **screen recordings**, it's crucial to follow best practices that deliver clear and engaging videos. Adopting effective recording techniques can ensure your audience stays engaged and retains the message conveyed through your recordings.
Optimizing Video Quality Settings
The quality of a **screen recording** can greatly affect viewer experience. Select the highest possible resolution your PC can handle for a crystal-clear output. Adjusting your **recording settings for best performance** ensures you aren’t just getting resolution but also maintaining a clear sound by optimizing **audio recording** from your mic and system sounds, which is critical for instructional videos and tutorials.
Effective Use of Script and Timing
Before you start recording, create a script or a flow of the content you’re planning to cover. This preparation helps ensure you hit all critical points without excessive pauses or redundant material. Practice to maintain a steady pace, making your **capture screen** more engaging and effective.
Post-Recording Editing Tips
Post-processing your recordings is just as contributing to your video content as the recording itself. You might want to remove long pauses, split long recordings into manageable clips, or incorporate texts explaining sections. Tools that allow you to **edit screen recordings** can significantly enhance your video’s engagement, making it more informative without overwhelming the audience with unnecessary content.
FAQs About Screen Recording in Windows 10
1. How can I record my screen without any software?
If you need to **record screen** activity without third-party software, the built-in **Windows Game Bar** is your best option. Simply use the shortcut Windows + G to open it and follow the prompts to record your desktop or applications without downloading additional tools.
2. What are the best screen recording apps for beginners?
For beginners, user-friendly options like **OBS Studio** or **Camtasia** are excellent, offering simple interfaces with powerful features. They allow for easy **screen capture** and basic editing, making the recording process straightforward while still providing quality results.
3. Can I record video tutorial using the Game Bar?
Absolutely! The **Windows 10 screen recorder** (Game Bar) is perfect for recording video tutorials. Simply start your recording while presenting your tutorial material, and you’ll be able to save and share your instructional video afterward.
4. Is it possible to adjust the recording area using screen recording software?
Yes! Most dedicated **screen recording tools** offer an **adjustable recording area**, letting you choose whether to record the whole screen or just a specific application window. This feature is excellent for focusing on details during tutorials or product demos.
5. How do I include audio in my screen recordings?
When using the **Windows Game Bar**, you can configure your **audio settings for recording** to ensure that your voice and any system sounds are included in the output. Adjust these settings in the Game Bar menu prior to starting your recording for the best results.
6. What is the fastest way to record gaming on my computer?
Using the **Windows Game Bar** provides a quick option for gamers. Just press Windows + G, set up your preferences, and use the recording shortcuts. For more advanced features, consider using specialized tools like Nvidia ShadowPlay for game capturing.
7. How can I share my recorded videos easily?
Once you finish editing your videos, you can easily upload them to platforms like YouTube or Vimeo directly from your screen recording software. Ensuring the file format is compatible before sharing enhances its accessibility.
“`